
Quick overview
| Type | Offensive |
|---|
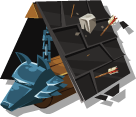
The Shield Wall is a siege tool that helps you in ranged combat at the walls. It works by significantly weakening the strength of defenders from a distance, so when you attack a castle backed by archers and crossbowmen, you have the upper hand in this regard. It is not a tool for gates or close defense; its domain is ranged combat. On its own, it won't win the attack, but as support in the right setup, it can save you a decent number of units.
How to use it
Deploy it when you are attacking a target where the defender relies on ranged defense (archers, crossbowmen, and similar). Include it in the attack where you are pushing against this part of the defense to ensure the weakening is truly felt. If you know that your opponent has a defense primarily based on ranged combat, this is one of the first tools you should include in your attack. Conversely, you don't need to waste it on a target without significant ranged defense.
What to combine it with
It belongs to a purely offensive siege setup. Pair it with tools that address other types of defense and wall bonuses to cover all directions, not just ranged. It typically works alongside tools for close combat and for breaching gates, so its effect combines with others, allowing your main striking force to pass through with fewer losses. Alone, without support from attacking units, it won't solve anything.
Related tools


Back to Tools.