
Quick overview
| Type | Offensive |
|---|
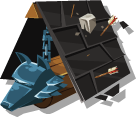
The Deathbringer's Crossing is a siege tool that reduces the defenders' protection from the moat. The moat provides defensive bonuses to frontline units, so when you knock it down, the defenders suddenly hold less, and your army can break through faster. By itself, it doesn't deal any damage; it only dilutes the defense and makes room for your attacking units. I consider it a classic support piece in the offensive arsenal against well-fortified targets.
How to use it
Deploy it where the target has a fortified moat and the defense is consuming too many of your units. It's a waste to use it on weak or empty castles; it pays off only against fortified targets where the moat genuinely adds protection to the defender. Place it on the flank where you plan to apply the main pressure, so its effect is maximized where the attack breaks through. It serves as groundwork for your main attacking units, not as a standalone weapon.
What to combine it with
It belongs to a purely offensive setup alongside siege engines and attacking units. It pairs excellently with tools that reduce other defensive values (walls, towers) or increase your soldiers' attack, allowing you to strip the defender's protection from multiple directions at once. Keep it on the same side as your strongest stack and supportive tools, so the bonuses accumulate where you break the defense.
Related tools


Back to Tools.