
Quick overview
| Type | Offensive |
|---|
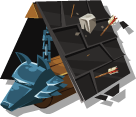
The siege shield is your mobile cover for attack — a wooden wall on wheels that you push in front of your army, reducing the defensive strength of enemies on the walls. It is an offensive siege tool and I consider it a standard part of any decent attack. It won't break through the walls by itself and won't take out a single defender, but by lowering the opponent's defense, more of your own units will survive, making the attack cheaper in terms of losses. The tougher the defense in front of you, the more the shield pays off.
How to use it
Deploy it against targets with well-equipped defenses — castles and locations where the opponent has placed many defenders and relied on defensive bonuses. Add the siege shield to your attack formation with the army to lower the enemy's defensive strength even before the actual clash, so you enter the battle against a weaker defense than what is actually present. It makes sense wherever you suspect a strong defense. When attacking a weakly defended target or something that can fall without siege tools, the shield takes up space in your equipment and doesn't add much — it's better to fill that space differently.
What to combine it with
The shield itself won't break down walls, so think of it as one part of the entire siege equipment, not as a solution to everything. Build your formation to fit within the tool limit and cover everything necessary: the siege shield to lower defense, battering rams or catapults for the walls, and depending on the target, tools against towers and gates. Additionally, deploy a commander with offensive items and activate castle bonuses for attack — everything adds up and the shield benefits from it. However, without a strong army behind you, even a powerful siege setup won't save the attack.
Related tools


Back to Tools.